Showing posts with label Tutorial. Show all posts
Showing posts with label Tutorial. Show all posts
Wednesday, June 16, 2010

Sunday, April 11, 2010
New Tut by Lisa!
Lisa had done it again! A new tut using my Bad Girl kit! What a lovely tag and Thank you soo much for mine.

Check out her tutorial here

Check out her tutorial here
Sunday, February 21, 2010
Shamrock Girl Tut

Artwork by Ismael Rac. You need a license to use hit artwork and it can be purchased at AMI
Scrapkit called St. Patty by Fantasy Moments and you can get it HERE
Mask by me and you can download it below.
Open FM_St-Patty-Element-49. Duplicate, close the original. Resize by 80%. Use magic wand and select the middle of the frame. Selections/modify/expand by 2. Open paper of choice. I used 17. Copy and paste as new layer. Selections/Invert and delete. Deselect. Drag the paper layer below the frame layer.
With the frame layer activated duplicate. On the duplicated layer resize again by 80. Free Rotate by 25 degrees. Adjust/Sharpen. Use Magic Wand and select inside the smaller frame layer. Selections/Modify by 2. Add a new layer. Use 2 colors from your tube and chose the foreground/background gradient and flood fill. Drag that layer below the small frame layer. Do not Deselect.
Copy and paste your closeup tube as a new layer. Position where desired then go to selections/invert and hit delete. Deselect. You can play with some filters or layer options here. On mine I did Xero radiance and then layer properties Luminance (L) and lowered the opacity to 75.
Once you got that part looking the way you want go to layers/merge all visible.
Add a new layer and flood fill it with a dark color of your choice. Load mask CJC_Shamrockmask1. Merge group and drag below your frame layer. Now you can add any elements you like. This is where you can use your creativity.
Once you are done you can add a full image tube in the frount or just leave it like it is.
Don't forget the most important part and that is the Credits!
Monday, January 18, 2010
Sensitive Tutorial

Sensitive Tut
Artwork by Ismael Rac. Purchase from AMI here
Scrapkit "Sensitive" by Fantasy Scraps here
Only filter used was Gradient Glow for Text only.
Open New Image 600x600
Copy and Paste FM-Sensitive-Element-39 as new layer. Resized 80%.
Copy and paste FM-Sensitive-Element-62 as new layer. Resized 90%. Mirror and position where liked.
Copy and paste FM-Sensitive-Element-76 as new layer. Resize and position it to the left side.
Select 2 colors from your for the foreground and background. Choose the foreground/background gradient.
Use your magic wand and select inside of the frames. Selections/Modify/expand by 4. Add new raster layer and fill with gradient.
Move layer below the frame layer.
With frame layer active use your magic wand to select the inside of the top frame again and modify by 4.
Paste tube as new layer. Postion where desired and invert selections and delete. Drag below the frame layer. Change tube layer properties to Luminance (L)
Activate frame layer again and use magic wand to select the bottom part of the frame and modify by 4.
Paste tube as new layer. Postion where desired and invert selections and delete. Drag below the frame layer. Change tube layer properties to Luminance (L)
Copy and paste your fullsized tube and postion/mirror whatever you like.
Now add whatever elements you like to make this tag your own.
Dont forget the copyright details.
Thank you for trying my tut and I hope you enjoyed it. I would love to see your creations.
Saturday, January 16, 2010
Sexy Valentine Tutorial
Sexy Valentine Tut

Artwork by Ismael Rac at AMI here
Scrapkit by Fantasy Moments here
Template by me here
WSL_Mask353 by weescotslass here
Filters used:
Pentacom- Colordot
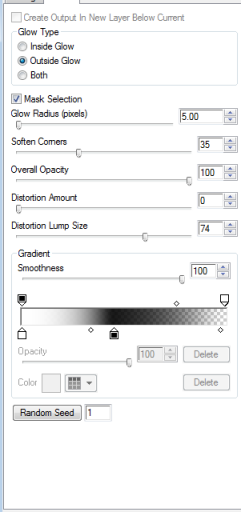
Alien Skin, Eyecandy Gradient Glow
Open my template in PSP. Duplicate and close the original. Delete the info layer.
Activate blackcircle layer and use magic wand to select it. Add a new raster layer. Choose darker color from tube and floodfill circle. Then apply pentacom color dot with following setting:

Activate hearts layer. Use magic wand to select hearts. Choose FM_Sweet Valentine 22 and copy and paste as new layer. Selections/Modify/Smooth with these settings: Smoothing amount-8 Corner scale-7. Selections/Invert and hit delete. Delect and apply dropshadow of choice.
Activate heart1 layer. Use magic wand to select it. Choose 2 colors for your gradient. I chose white and a light pink color. Floodfill heart with gradient. With heart still selected copy and paste your tube. Postion it where you like then Invert and delete.
Invert selection again. Duplicate tube layer. On bottom tube layer gaussian blur at 7. Change layer properties to softlight. On top layer change layer properties to luminance (L)
Activate heart 2 layer and repeat the same steps as above for the heart1 layer.
Activate Sexy Wordart of your choice. Selections/select all/ float then defloat. Copy and paste tube with you like. Selections/Invert and hit delete key. Lower opacity on tube layer to 50%.Activate Sexy Wordart again and apply Eyecandy Gradient Glow with following settings:

Activate Grayrectangle and select with magic wand. Floodfill with color or gradient of your choice. Apply same Gradient Glow as before.
Activate the Valentine wordart and change the color to whatever you like. You can add dropshadow or gradient glow, whatever you like.
Copy and paste your tube again. Resize if needed. Postion it where you like.
I decided to resize my circle layer by 80%. You can do this or keep it the same.
Activate background layer and floodfill with red or color of choice. Apply WSL_Mask353. Merge group.
Add and elements you like. Don't forget the copyright info.
Thank you for trying my tut. I welcome and questions, sugestions and friend advice. So please feel free to comment or shoot me an email at ChaneyJo@gmail.com
Sunday, November 29, 2009
All I want for Christmas tut (and Template)
Here is my newest template.


Need a few tubes of choice.
I used Artwork by Ismael Rac. You need a license to use his work and you can get one at AMI
Scrapkit A Taggers Christmas by Bel Vidotti
Template by ME! Here
Filters needed:
Xero-Radiance
Eye Candy-Gradient Glow
Ok Lets get started.
Open my template. Canvas size 650x650. Can crop later.
Activate Rectangle1 layer. Use your magic want to select it.
Open paper atcp05. Copy and paste as new layer. Selections, Invert, delete. Selections, Invert again.
Copy and paste your tube as a new layer. Resize if needed and postion where you like. Selections, Invert, Delete. Select none
Duplicate your tube layer. Name them Tube1 and Tube 2. Drag the Tube1 layer above the YOU layer.
Select the YOU layer. Selections, Select All, Float, Defloat. Then make your Tube1 later active. Selections, Invert, Delete.
Back on the YOU layer apply Eye Candy Gradient Glow and give it a small white glow.
Now on your Tube2 layer lower then opacity to 75 or whatever you like.
Give your Paper layer a glow using these settings:
Now activate your circle layer use your magic wand to select it.
Open paper atcp17 and copy and paste as a new layer. Resize by 70% and postion it where you like. Selections, Invert, Delete.
Apply gradient glow with settings above by change the outside color to red.
Now open paper atcp03 and copy it. With square1 active select it with your magic wand. Add new raster layer. Paste into selection.
Do this with square2 and square3.
Now on square1 frame select it with your magic wand. New Raster Layer and fill with color of your choice. Adjust, Add noise at 35%.
Do the same for square2 frame and square3 frame.
Now paste your tube as new layer. Move over in front of the 3 squares. Duplicate 2 times. Hide the duplicated layers.
Activate your Square1 Paperlayer. select all, float, defloat. Activate your tube layer again. Selections, invert, delete.
Do the same for the other 2 aquares.
You might have to drag the tube layers down to make sure they are hid behind the right frames.
On your tube layers apply the Xero Radiance filter with default settings.
Now paste your other tube and postion where you like. Now you can add whatever elements your like.
Don't forget your credits. Save and your are done.
Thank you for trying my tut and I hope you liked it. I would love to see any creations you make with my tut.
Saturday, November 28, 2009
Rock Baby Tut

Artwork by Ismael Rac get at AMI
Scrapkit Rock Baby by Pink Pleasures Scraps
Mask #407 by Vix here
Open RB_pp11. Duplicate and close original. Apply Vix mask #407. Merge Group
Take selection tool, rectangle, and outline the inside of one of the rectangles.
Copy and paste your tube. Move into the selection then invert selection and delete. Select none.
Duplicate tube. Name layers Tube1 and Tube2.
Make Tube1 layer active and duplicate it. Apply Gaussian blue - 4 to the original layer.
Go to layer properties and change blend mode to soft light.
Activate Copy of Tube1 layer and change blend mode to Luminace Legacy.
Go to Tube2 layer and repeat the same steps as above. Merge all Visible.
Open RB_ele35 and copy and paste it as a new layer. Bring the layer under the merged layer.
Move to upper left corner. Duplicate, Mirror and Flip.
Copy and paste your tube. Position it they way you like. Apply dropshadow to your liking.
Now you can choose elements you like and postion them how you like.
Dont forget to add credits where needed.
Thank you and hope you enjoyed my tut.
Sexy Eyes Tut

You will need:
A tube and a close up tube.
Artwork by Ismael Rac. You can get a license to use his art at AMI
Scrap kit Dominated by Tantrum Scraps. Can get it here.
Mask by Rachel at Scraps of Enchantment.
Preset Shape from Scrap Stuff here.
Filters Needed.
Superblade Pro Preset Crystal Crunch you can get here
Eyecandy Gradient Glow
Fonts I used are Impact and TheNautiGirl
Open a New Tansparent 600x600 (we can resize later)
Using your Preset Shapes tool draw out your shape to your desired size. I used SK Psycadelic 06. Convert to Raster Layer and rename shape
Grab your magic wand tool. Select the outside line of your shape. Add New Raster layer. Flood Fill with a color from your tube.
Make your shape layer active again and using your magic wand select the middle line of the shape. Add New Raster layer.Flood Fill with a diffrent color from your tube.
Make your shape layer active again and using your magic wand select the middle part of our shape. Add New Raster layer.Flood Fill with the same color from the first line.
Make your First line layer active. Go to Effect, Plugins Superblade Pro. Use the Crystal Crunch preset. Do the same for the middle part of the the shape.
Make your Middle Line layer active. Go to adjust-add/remove noise. Add Noise at 55% with uniform and monochrome checked.
Make the middle part of your shape active again. Selections, Float, then Defloat. Cope and paste your tube as New layer. Move where desired. Selections, Invert and hit Delete.
Invert selection again. Duplicate your tube. One the original tube layer Adjust-Blur-Gaussian Blur-3. Change Layer Blend mode to Soft Light.
On Duplicated layer change blend mode to Luminance Legacy. Merge All Visible. Add Dropshadow H and V-0, O-60, B-6
New Rasterlayer. Flood Fill Black. Load SOE_Mask17_byRachel09. Merge Group and move Below other merged layer.
Open Tantrum Scraps Dominated_glitterframe3. Copy and paste and position where you like.
Copy and paste your tube. Resize if needed and postion where you like.
Now you can add any elements or wordart you like.
Dont forget to add your credits!
Thank you for trying my tut. If you have any questions or would like to send me your results email me at ChaneyJo@gmail.com
Subscribe to:
Posts (Atom)