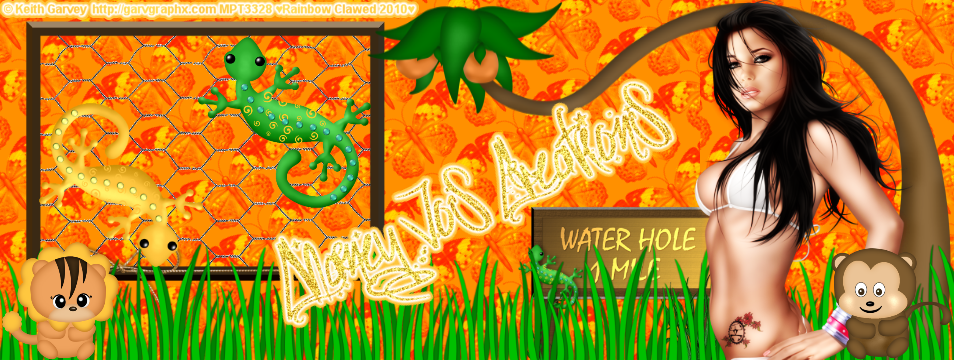
Here is my newest template.


Need a few tubes of choice.
I used Artwork by Ismael Rac. You need a license to use his work and you can get one at AMI
Scrapkit A Taggers Christmas by Bel Vidotti
Template by ME! Here
Filters needed:
Xero-Radiance
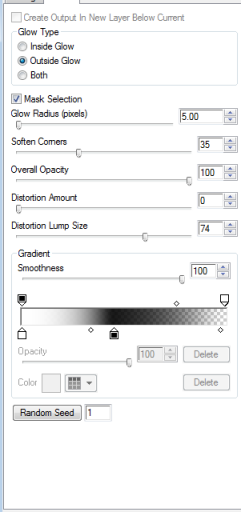
Eye Candy-Gradient Glow
Ok Lets get started.
Open my template. Canvas size 650x650. Can crop later.
Activate Rectangle1 layer. Use your magic want to select it.
Open paper atcp05. Copy and paste as new layer. Selections, Invert, delete. Selections, Invert again.
Copy and paste your tube as a new layer. Resize if needed and postion where you like. Selections, Invert, Delete. Select none
Duplicate your tube layer. Name them Tube1 and Tube 2. Drag the Tube1 layer above the YOU layer.
Select the YOU layer. Selections, Select All, Float, Defloat. Then make your Tube1 later active. Selections, Invert, Delete.
Back on the YOU layer apply Eye Candy Gradient Glow and give it a small white glow.
Now on your Tube2 layer lower then opacity to 75 or whatever you like.
Give your Paper layer a glow using these settings:
Now activate your circle layer use your magic wand to select it.
Open paper atcp17 and copy and paste as a new layer. Resize by 70% and postion it where you like. Selections, Invert, Delete.
Apply gradient glow with settings above by change the outside color to red.
Now open paper atcp03 and copy it. With square1 active select it with your magic wand. Add new raster layer. Paste into selection.
Do this with square2 and square3.
Now on square1 frame select it with your magic wand. New Raster Layer and fill with color of your choice. Adjust, Add noise at 35%.
Do the same for square2 frame and square3 frame.
Now paste your tube as new layer. Move over in front of the 3 squares. Duplicate 2 times. Hide the duplicated layers.
Activate your Square1 Paperlayer. select all, float, defloat. Activate your tube layer again. Selections, invert, delete.
Do the same for the other 2 aquares.
You might have to drag the tube layers down to make sure they are hid behind the right frames.
On your tube layers apply the Xero Radiance filter with default settings.
Now paste your other tube and postion where you like. Now you can add whatever elements your like.
Don't forget your credits. Save and your are done.
Thank you for trying my tut and I hope you liked it. I would love to see any creations you make with my tut.
I used Artwork by Ismael Rac. You need a license to use his work and you can get one at AMI
Scrapkit A Taggers Christmas by Bel Vidotti
Template by ME! Here
Filters needed:
Xero-Radiance
Eye Candy-Gradient Glow
Ok Lets get started.
Open my template. Canvas size 650x650. Can crop later.
Activate Rectangle1 layer. Use your magic want to select it.
Open paper atcp05. Copy and paste as new layer. Selections, Invert, delete. Selections, Invert again.
Copy and paste your tube as a new layer. Resize if needed and postion where you like. Selections, Invert, Delete. Select none
Duplicate your tube layer. Name them Tube1 and Tube 2. Drag the Tube1 layer above the YOU layer.
Select the YOU layer. Selections, Select All, Float, Defloat. Then make your Tube1 later active. Selections, Invert, Delete.
Back on the YOU layer apply Eye Candy Gradient Glow and give it a small white glow.
Now on your Tube2 layer lower then opacity to 75 or whatever you like.
Give your Paper layer a glow using these settings:
Now activate your circle layer use your magic wand to select it.
Open paper atcp17 and copy and paste as a new layer. Resize by 70% and postion it where you like. Selections, Invert, Delete.
Apply gradient glow with settings above by change the outside color to red.
Now open paper atcp03 and copy it. With square1 active select it with your magic wand. Add new raster layer. Paste into selection.
Do this with square2 and square3.
Now on square1 frame select it with your magic wand. New Raster Layer and fill with color of your choice. Adjust, Add noise at 35%.
Do the same for square2 frame and square3 frame.
Now paste your tube as new layer. Move over in front of the 3 squares. Duplicate 2 times. Hide the duplicated layers.
Activate your Square1 Paperlayer. select all, float, defloat. Activate your tube layer again. Selections, invert, delete.
Do the same for the other 2 aquares.
You might have to drag the tube layers down to make sure they are hid behind the right frames.
On your tube layers apply the Xero Radiance filter with default settings.
Now paste your other tube and postion where you like. Now you can add whatever elements your like.
Don't forget your credits. Save and your are done.
Thank you for trying my tut and I hope you liked it. I would love to see any creations you make with my tut.
No comments:
Post a Comment